

Ever wondered what makes a cocktail go from good to unforgettable? The secret lies in skilled mixologists' techniques. Mastering these methods can transform your home bar experience, impressing your friends and elevating your own enjoyment.
In this post, we’ll break down the why and how behind each method.
1. Shaking

The art of shaking cocktails dates back to the early 19th century when bartenders began to experiment with different methods to mix and chill drinks. Shaking became popular in American saloons, spreading internationally as a critical technique in the bartender's repertoire.
The purpose of shaking a cocktail is multifaceted. Besides chilling the ingredients, shaking dilutes and aerates them. It creates a balanced and refreshing drink.
As the ice in the shaker melts, it dilutes the drink slightly, balancing the flavors. Aeration introduces tiny air bubbles, giving cocktails like sours their characteristic frothy texture.
When to shake?

Shaking is not necessary or desirable for all cocktail recipes. You should use this technique when making delicious cocktails, including those with fruit juices, syrups, cream, and egg whites.
Classic examples of classic cocktails made using this technique are:
- Margaritas
- Daiquiris
- Cosmopolitans
The tools you’ll need
You need the right tools to shake a cocktail effectively. Professional mixologists use three shakers:
Boston shaker
It is a two-piece shaker with a metal tin and a glass. You might have seen bartenders and mixologists use it to prepare cocktails. Being versatile and having a larger capacity, it is one of the most favored shakers by professional bartenders. The only downside is that you’ll need a separate strainer to pour the drink.
Cobbler shaker
Unlike the Boston shaker, this is a three-piece shaker with a metal tin, lid, built-in strainer, and cap. It is a great shaker for building a home bar, as it is very user-friendly. You have to be careful with this one, though, as it is prone to leaks if you don't seal it properly.
French shaker
Also known as a Parisian shaker, this two-piece metal shaker combines the Boston shaker's simplicity with the cobbler's aesthetic appeal. It's stylish and effective but also requires a separate strainer.
Proper shaking technique
Even if you have the world's best shaker, you'll need an excellent technique to get the best results. Here are the basic principles of how you can shake your cocktails to get the best consistency, flavor, and texture:
- Grip: To ensure a secure grip, hold the cocktail shaker with both hands, one on each part of the shaker. For a Boston shaker, one hand should be on the bottom tin and the other on the top mixing glass.
- Movement: Shake the cocktail with a vigorous back-and-forth motion, ideally over your shoulder or from side to side, to ensure all ingredients are thoroughly mixed.
- Duration: Shake until the outside of the shaker becomes frosty (15-30 seconds), indicating the drink is well-chilled.
Common mistakes and tips
Even with the right tools and techniques, you can make mistakes. Here are some common pitfalls when you use this mixology technique and how to avoid them:
Over-shaking or under-shaking
Over-shaking can dilute the drink too much, while under-shaking might leave it warm and poorly mixed. Aim for a balanced shake of about 10-15 seconds.
Not ensuring a proper seal
The last thing you want is the shaker coming apart mid-shake, leading to spills. To avoid this, make sure the parts of the shaker are securely fitted together before you start shaking. Give the mixing tin a firm tap with a Boston shaker to create a tight seal with the glass.
2. Stirring

Stirring is one of the oldest techniques in mixology, dating back to the 19th century. Unlike shaking, which is more vigorous and disruptive, stirring is all about subtlety and finesse.
It’s the preferred method for mixing drinks that require a gentle touch to preserve their clarity and texture. The primary purpose of stirring drinks is to chill and dilute them enough to balance the flavors without introducing air or breaking down the ingredients too much.
When using this technique, you achieve minimal dilution, ensuring the drink is cooled without becoming too watery. The technique maintains the clarity of the cocktail, giving it a pristine appearance and a smooth texture.
It's about achieving the perfect balance where the ingredients blend harmoniously without losing their characteristics.
When to stir?

Stirring is a perfect technique for cocktails and mixed drinks that contain only spirits, liqueurs, and bitters. These ingredients mix well together without needing the force of shaking. Some delicious cocktails you can make using stirring include:
- Martinis
- Manhattans
- Negronis
The tools you’ll need
You need the right tools to stir your cocktail for the best results. Here are some essentials that you must have in your bar to mix drinks:
- Mixing glass: A mixing glass is typically sturdy and transparent, letting you see the contents as you stir. Its wide mouth makes adding ingredients and ice easier.
- Bar spoon: This is a long-handled spoon specifically designed for stirring cocktails. Its long and twisted handle makes it easy to reach the bottom of tall glasses like the pint glass.
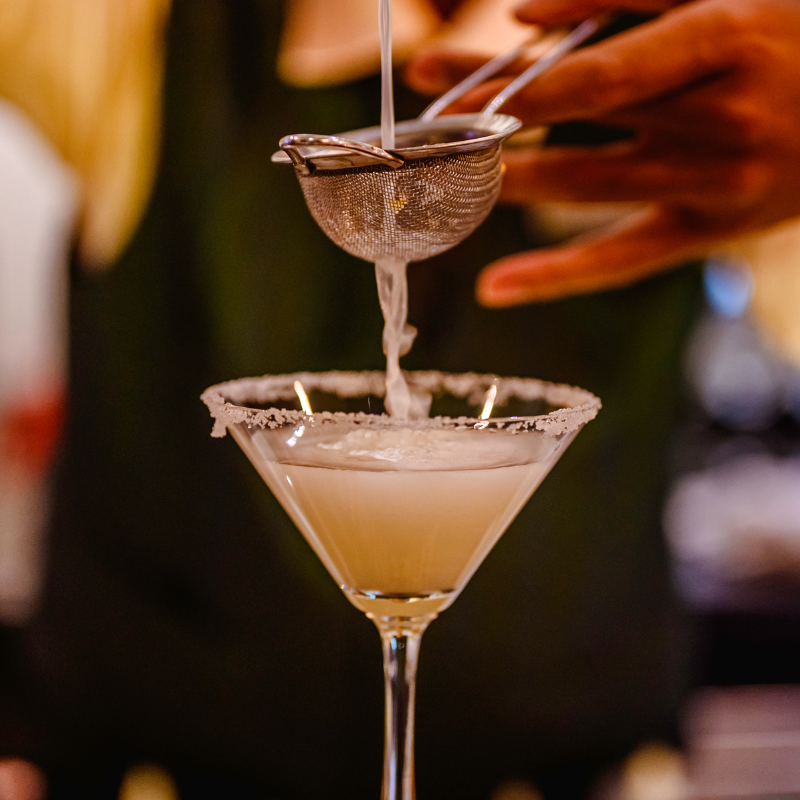
- Strainer: After stirring, you’ll need a strainer to pour the cocktail into the serving glass while keeping the ice and other solids behind.
Proper stirring technique
While it might appear simple, there is a technique behind how you stir your mixed drink. Here are the essentials you should keep in mind:
- Motion: Hold the bar spoon between your thumb and fingers and stir with a gentle circular motion. Remember, your goal is to move the ice around the mixing glass without too much splashing or agitating the liquid.
- Speed: You should always stir at a moderate pace. Too fast, and you risk diluting the drink too much; too slow, and it won’t chill properly.
- Duration: Depending on your cocktail recipe, stir for about 20-30 seconds or until the glass feels cold to the touch.
Common mistakes and tips
Even with a straightforward technique like stirring, there are common mistakes you can fall for. Here are a few of the most common ones and how you can avoid them:
- Over-stirring or under-stirring: Over-stirring can dilute the drink too much, making it weak, while under-stirring can leave it too strong and not adequately chilled. Aim for that sweet spot of 20-30 seconds for most cocktail recipes.
- Not using fresh ice: Always use fresh, clean ice. Ice that has started to melt or has been sitting out can affect the quality of your cocktail.
- Not having quality ingredients: The quality of the ingredients you use makes a big difference. High-quality spirits, fresh vermouth, and good bitters will produce a superior cocktail.
You can create a refreshing margarita with DrinkPax using the stirring technique. Simply pour the DrinkPax Margarita Mix into a glass with ice, add your favorite spirit, and stir gently. The pre-mixed flavors are perfectly balanced, so you only need a bar spoon to enjoy a delicious, hassle-free cocktail!
3. Muddling

Muddling has been a cornerstone of cocktail-making for centuries. Its use can be traced back to the early days of the cocktail, where bartenders used simple tools to crush fruits, herbs, and spices to release their essential oils and flavors.
The technique was crucial in an era before the widespread availability of flavored syrups and mixers. Today, muddling remains a fundamental skill in mixology, valued for enhancing cocktails' aroma and taste by extracting the freshest flavors from ingredients.
Muddling is all about maximizing the flavor potential of your ingredients. You break down their cell walls by crushing fruits, herbs, and spices, releasing essential oils and juices that contribute to the drink's overall profile.
When to muddle?

Muddling is essential for certain cocktails that rely on the fresh flavors of fruits, herbs, and spices. Some popular great cocktails include:
- Mojitos
- Old Fashioneds
- Caipirinhas
The tools you’ll need
You need the right tools and a good technique to muddle effectively. The essential tool for muddling is the muddler, which comes in various materials:
- Wooden muddler: Traditional and popular wooden muddlers are gentle on ingredients but can be harder to clean.
- Metal muddler: Metal muddlers are durable and easy to clean, so they are often used in professional settings. However, if not used carefully, they can be too harsh on delicate ingredients.
- Plastic muddler: Lightweight and versatile, plastic muddlers are a good home-use option and are easy to maintain.
Proper muddling technique
You need a proper muddling technique to bring out the flavors and take your cocktail game to the next level.
Place the ingredients in the bottom of a cold glass or shaker. Press down with the muddler and twist, using a gentle rocking motion for herbs and a more forceful pressing motion for fruits.
Gentle vs. vigorous muddling
The key to effective muddling is knowing when to be gentle and when to apply more pressure. Gentle muddling is sufficient for delicate herbs like mint to release their aroma without breaking them down too much. A more vigorous approach is needed for fruits and tougher ingredients to extract maximum flavor.
Common mistakes and tips
Here are a few muddling pitfalls you should try to avoid:
Over-muddling or under-muddling
Over-muddling fruits and herbs can result in a bitter taste, especially with herbs while under-muddling can leave the flavors weak and unbalanced. Aim for just enough pressure to release the essential oils and juices without crushing the ingredients into a pulp, especially for citrus juices like lemon juice.
Using too much pressure
When muddling herbs, be gentle to avoid releasing chlorophyll, which can make your drink taste bitter. For fruits, ensure you're not muddling the pith or seeds, which can also add unwanted bitterness. Always use gentle pressure when muddling.
FAQs
Here are the answers to some common questions regarding mixology techniques:
What is the golden rule of mixology?
The golden rule of mixology is balance. Every cocktail should harmonize flavors—sweet, sour, bitter, and strong—creating a well-rounded and enjoyable drink. Balancing these elements ensures a perfect sip every time, making the cocktail delicious and memorable.
Why do bar spoons have twisted handles?
Bar spoons have twisted handles to make stirring smoother and more efficient. The twisted design helps the spoon glide through the liquid, minimizing resistance and allowing for better control.
Takeaway: Utilize the right mixology technique to make the perfect cocktail
Mastering the basic mixology techniques of shaking, stirring, and muddling can elevate your cocktail-making skills. With these foundational methods, you can explore a world of flavors and always impress your guests with perfect cocktails.
Ready to enjoy delicious, guilt-free cocktails? Order your favorite cocktails from DrinkPax. They are made with premium ingredients and no added sugars.


Leave a comment (all fields required)